
This post contains affiliate links. As an Amazon Associate I earn from qualifying purchases.
Cold mornings, a hat, a scarf and static all work against your hair in winter. A braid fixes most of that. It stays put under a beanie, keeps ends away from a wool collar, and still looks put together when you take your coat off.
The catch, if your hair is fine, is that braids can look thin and slip loose by lunch. The short answer: add grip before you start, braid a little tighter at the top, then gently pull the braid wider at the end. Here is how to do a winter braid in 5 easy steps, plus the braid styles worth trying this season.
The Quick Answer for Fine Hair
GRIP
Never Braid Freshly Washed, Silky Hair
Second-day hair or a mist of a volume and texture spray gives strands something to hold.
TENSION
Braid Snug at the Roots, Loose at the Ends
A firm start keeps the braid anchored while looser ends leave room to pancake.
VOLUME
Pull It Wider When You Finish
Gently tugging the outer loops makes a thin braid look twice as full.
HOLD
Use Small Elastics and Hidden Pins
clear mini elastics and a few brunette bobby pins keep fine hair secure without bulk.
What You’ll Need
- A wide-tooth comb to detangle without breakage
- A volume and texture spray for grip on fine or slippery hair
- Dry shampoo to add texture at the roots
- Sectioning clips to hold sections out of the way
- Clear mini elastics to secure the ends
- Brunette bobby pins to tuck in loose pieces
- An anti-humidity smoothing spray to tame flyaways and static
- Velvet scrunchies for a soft, winter-friendly finish
Step 1: Prep Fine Hair for Grip

Start with dry, detangled hair, ideally the day after you wash it. Fine hair that is too clean and silky lets sections slide out of place. Brush through with a wide-tooth comb, then mist a volume and texture spray from roots to ends, or work a little dry shampoo into the crown for extra lift. Smooth silver hair, like the Dutch braids shown here, holds a braid much better with that extra texture.
Hair type note: If your hair is very fine or thinning at the crown, focus the texture product there; that is where braids tend to look sparse.
Static fix: A light pass of an anti-humidity smoothing spray on the lengths calms the static that dry winter air brings.
Tools you need: a wide-tooth comb, a volume and texture spray, dry shampoo
Step 2: Section and Start at the Hairline
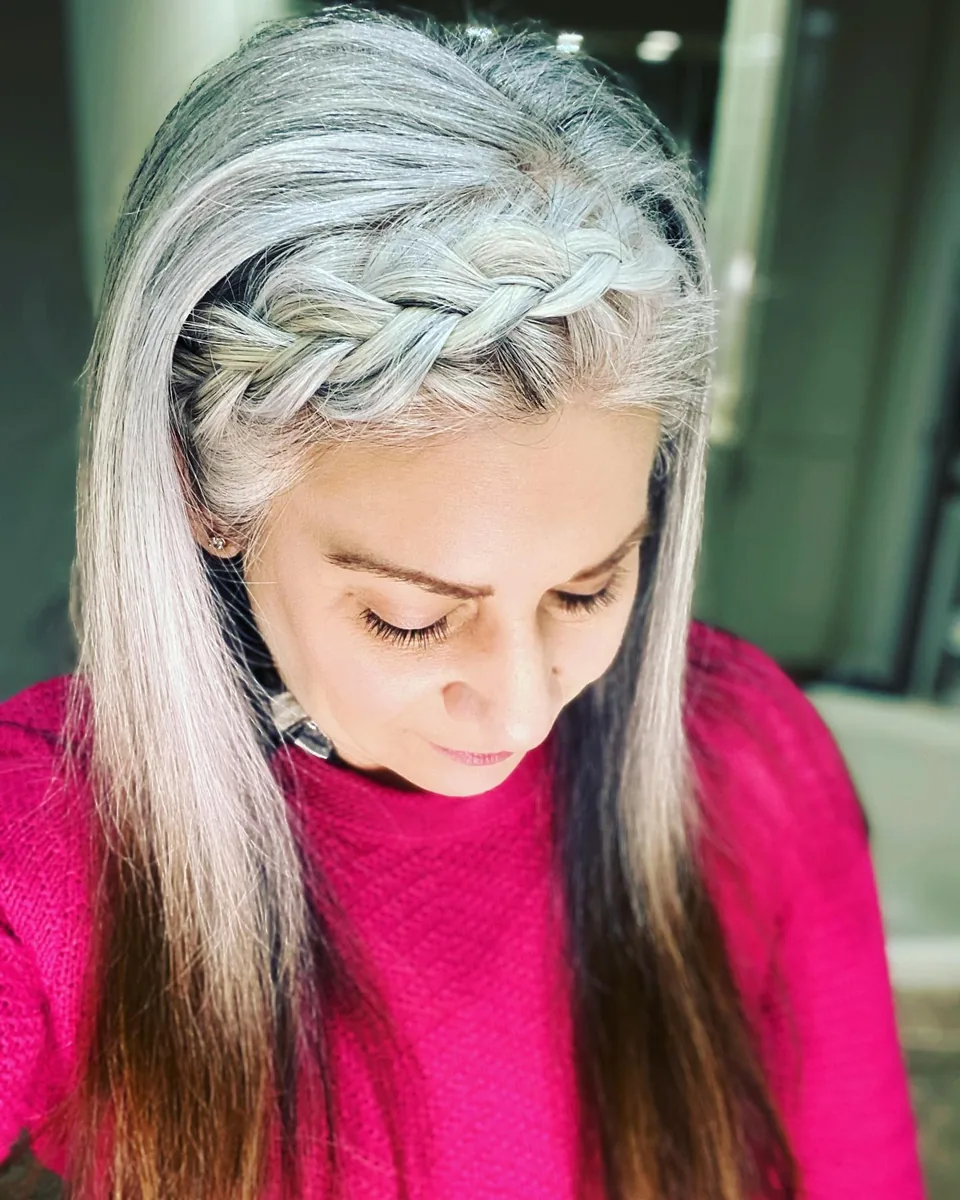
Take a small triangle of hair at your hairline, about two inches wide, and split it into three equal strands. Keep the rest of your hair smooth and clip side sections away with sectioning clips so they do not tangle in. A small starting section looks neater on fine hair than a big one.
Try this: Starting along the hairline, like the braid shown here, is a pretty way to show silver or gray hair and keeps shorter front pieces off the face.
Tool tip: The tail of a a teasing comb makes it easy to draw clean section lines.
Tools you need: sectioning clips, a teasing comb, a wide-tooth comb
Step 3: Cross Under (Dutch) or Over (French) and Add Hair
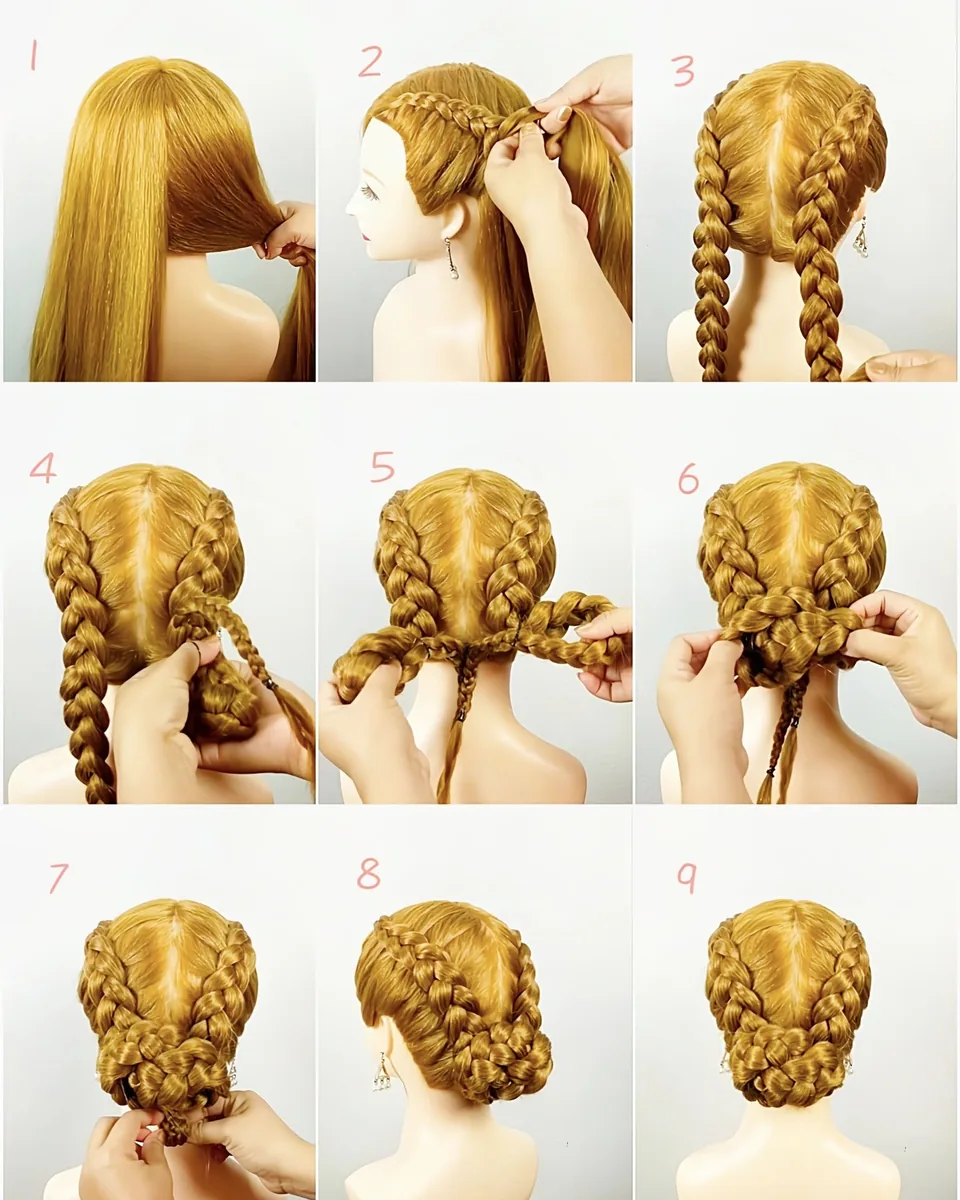
Now braid and add hair. For a Dutch braid, cross the outer strands under the middle strand so the braid sits on top of your hair. For a French braid, cross them over the middle so it lies flat. Each time you cross, pick up a thin section of loose hair along your scalp and add it to that strand, then continue until all the hair is gathered and finish with a regular three-strand braid.
Practice note: These step photos show two Dutch braids worked on a practice head. Doing one braid at a time down each side is easier than trying both at once.
Hair type note: Pick up smaller sections than you think you need on fine hair; it keeps the braid tighter and more even.
Tools you need: sectioning clips, clear mini elastics, a paddle brush
Step 4: Pancake the Braid for Fullness

Hold the end with one hand and gently pull the outer edge of each loop outward, working from the bottom up. This is called pancaking, and it is the secret to a full braid on fine hair. Go slowly and pull a little at a time so the braid stays even.
Volume tip: Before pancaking, dust a texturizing volume powder over the braid; the extra grip lets the loops stay wide.
Avoid this: Do not pull loops at the very top too hard, or the braid can loosen at the scalp.
Tools you need: a texturizing volume powder, a volume and texture spray, clear mini elastics
Step 5: Secure, Set and Add a Winter Finish
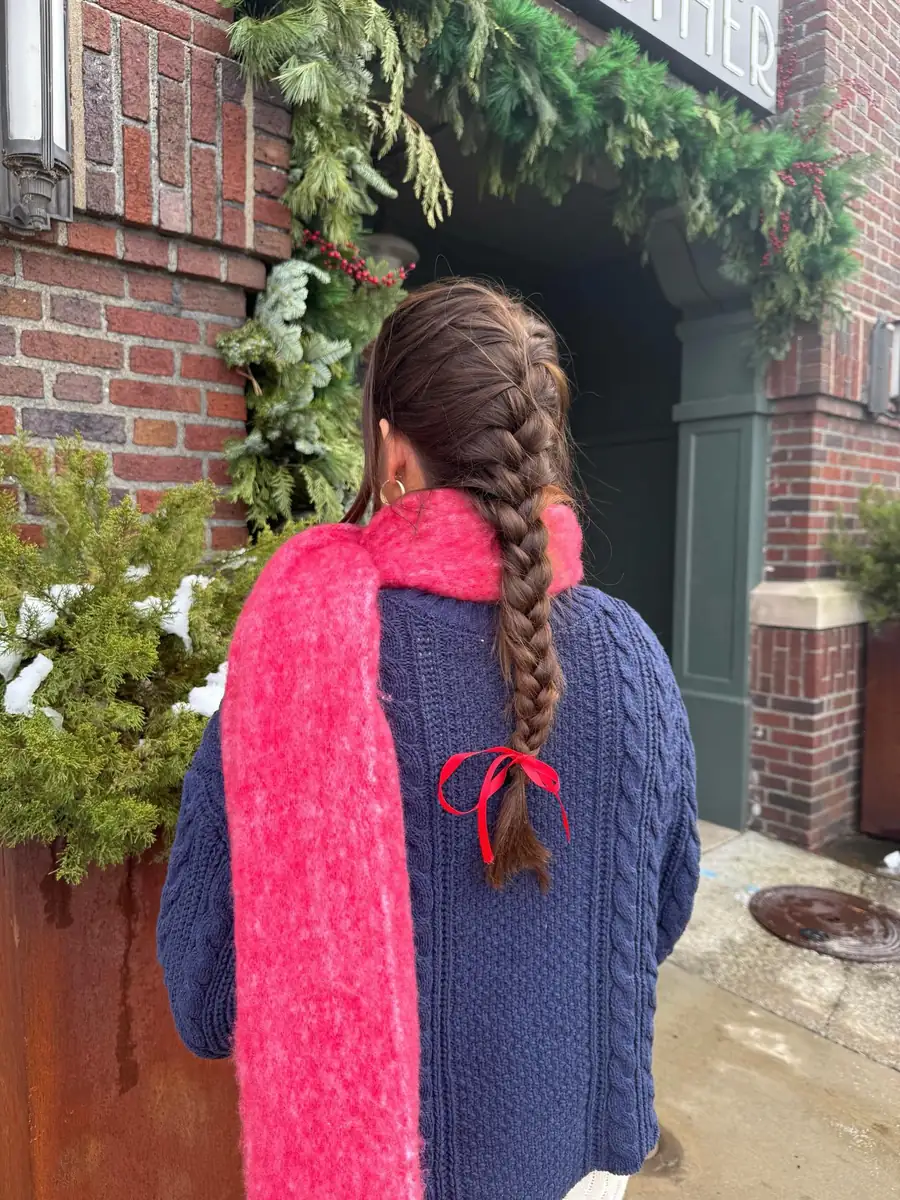
Secure the end with a small elastic, then add a winter finish: a ribbon, a velvet scrunchie or a bow. Tuck loose bits with pins and smooth flyaways at the hairline. A braid tied with a red ribbon and worn with a chunky scarf, like this one, is an easy holiday look.
Make it last: Slide two bobby pins crosswise just above the elastic so a fine-hair braid does not slip.
Overnight tip: Sleep on a mulberry silk pillowcase and loosen with mulberry silk scrunchies to keep tomorrow’s waves.
Tools you need: red velvet hair bows, velvet scrunchies, brunette bobby pins
Choose Your Winter Braid
Once you know the five steps, you can switch between styles. Here are the braids that work best in winter, including easy braid ideas for fine hair and for women over 50.
Dutch Braid
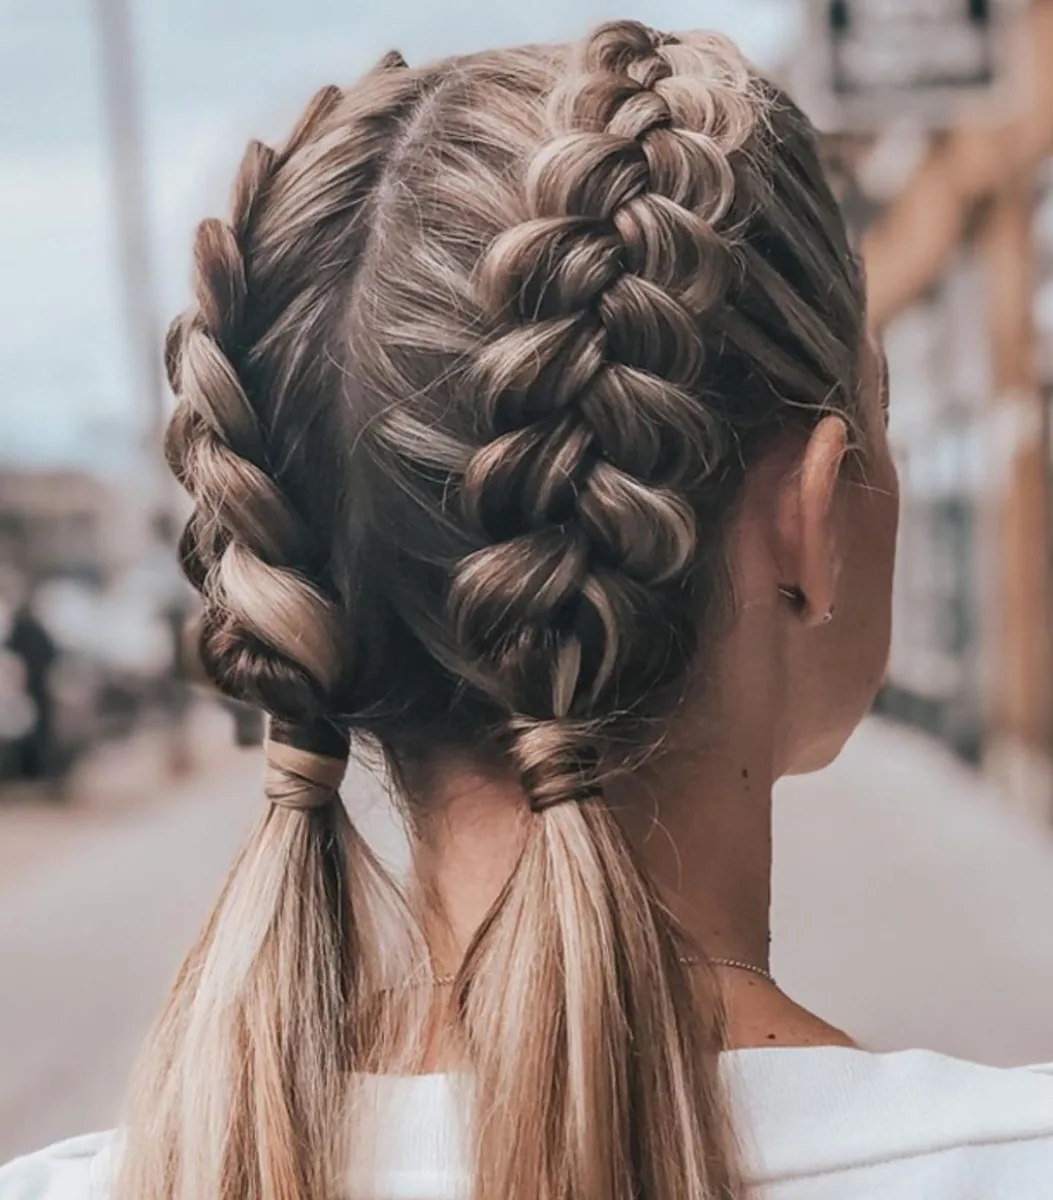
A Dutch braid sits raised on top of the hair, so it looks fuller than a French braid. It is one of the best choices for fine hair. Two Dutch braids, like these, are easy to wear under a beanie.
Hair type note: Because the braid is raised, it hides thin spots at the crown well.
Shop it: clear mini elastics, a volume and texture spray, sectioning clips
French Braid
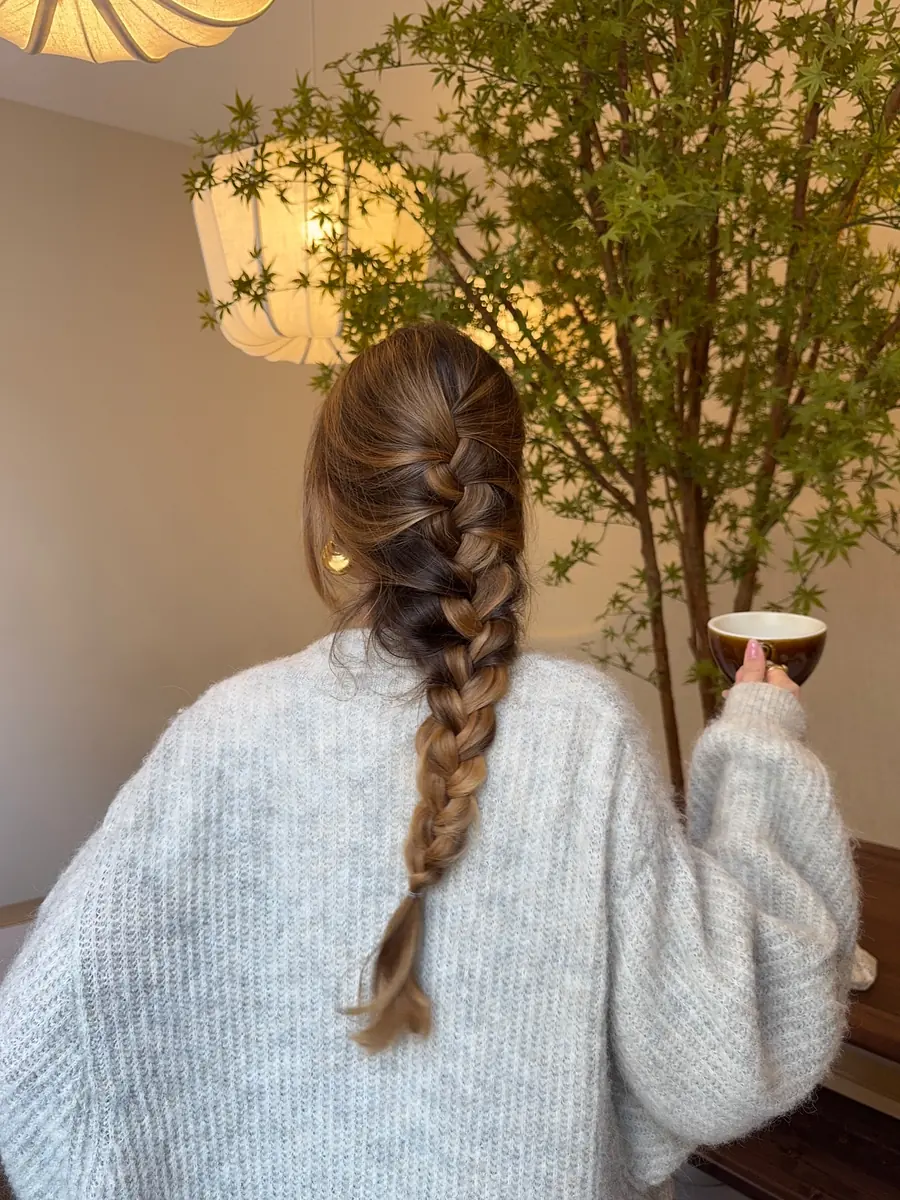
A French braid lies flatter and looks smooth and polished, which pairs well with a cozy knit. It is a classic winter braid for the office or a weekend coffee.
Make it softer: Pull a few pieces loose around the face for a gentler look.
Shop it: an anti-humidity smoothing spray, velvet scrunchies, a paddle brush
Fishtail Braid
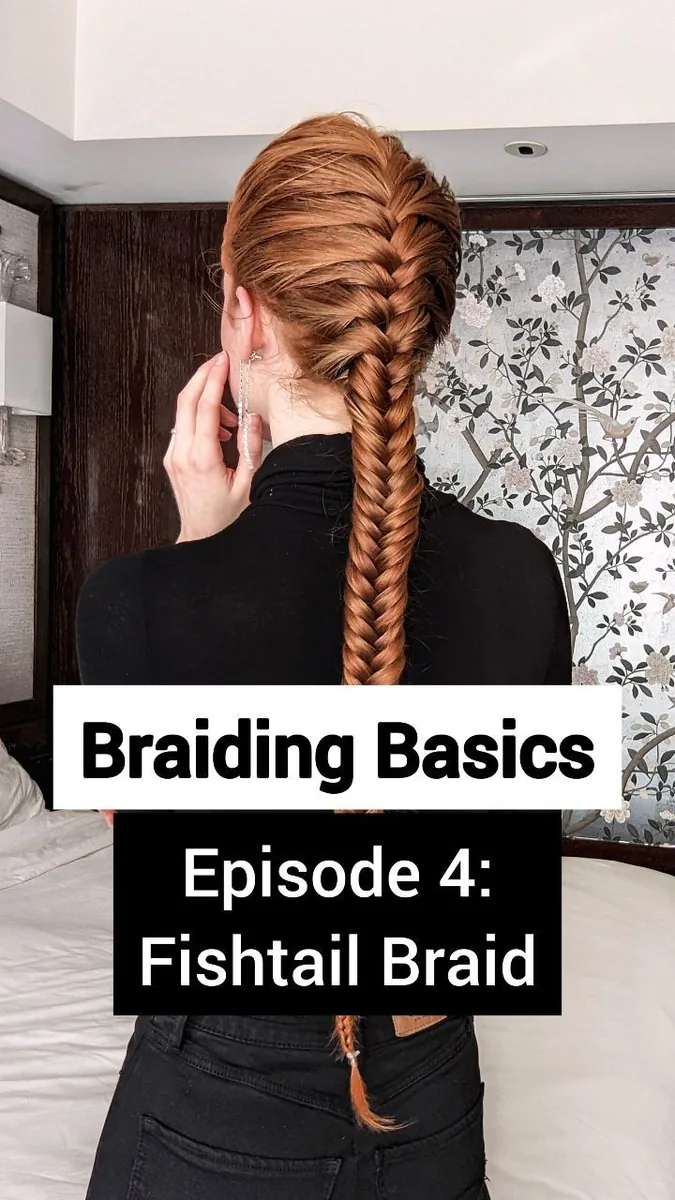
A fishtail uses two sections instead of three, crossing tiny pieces from the outside of each half. It looks intricate, but it is just repetition, and it hides fine hair well because the pattern is so busy.
Practice note: Smaller pieces give a neater fishtail; bigger pieces look more relaxed.
Shop it: clear mini elastics, a volume and texture spray, mulberry silk scrunchies
Braided Crown

A braided crown wraps across the top of the head like a headband, and silver hair shows the pattern beautifully. It keeps hair off the face all day and works on medium to long lengths.
How to secure it: Pin the ends under the opposite side with U-shaped hair pins and add a few brunette bobby pins.
Shop it: U-shaped hair pins, brunette bobby pins, an anti-humidity smoothing spray
Braided Halo Updo
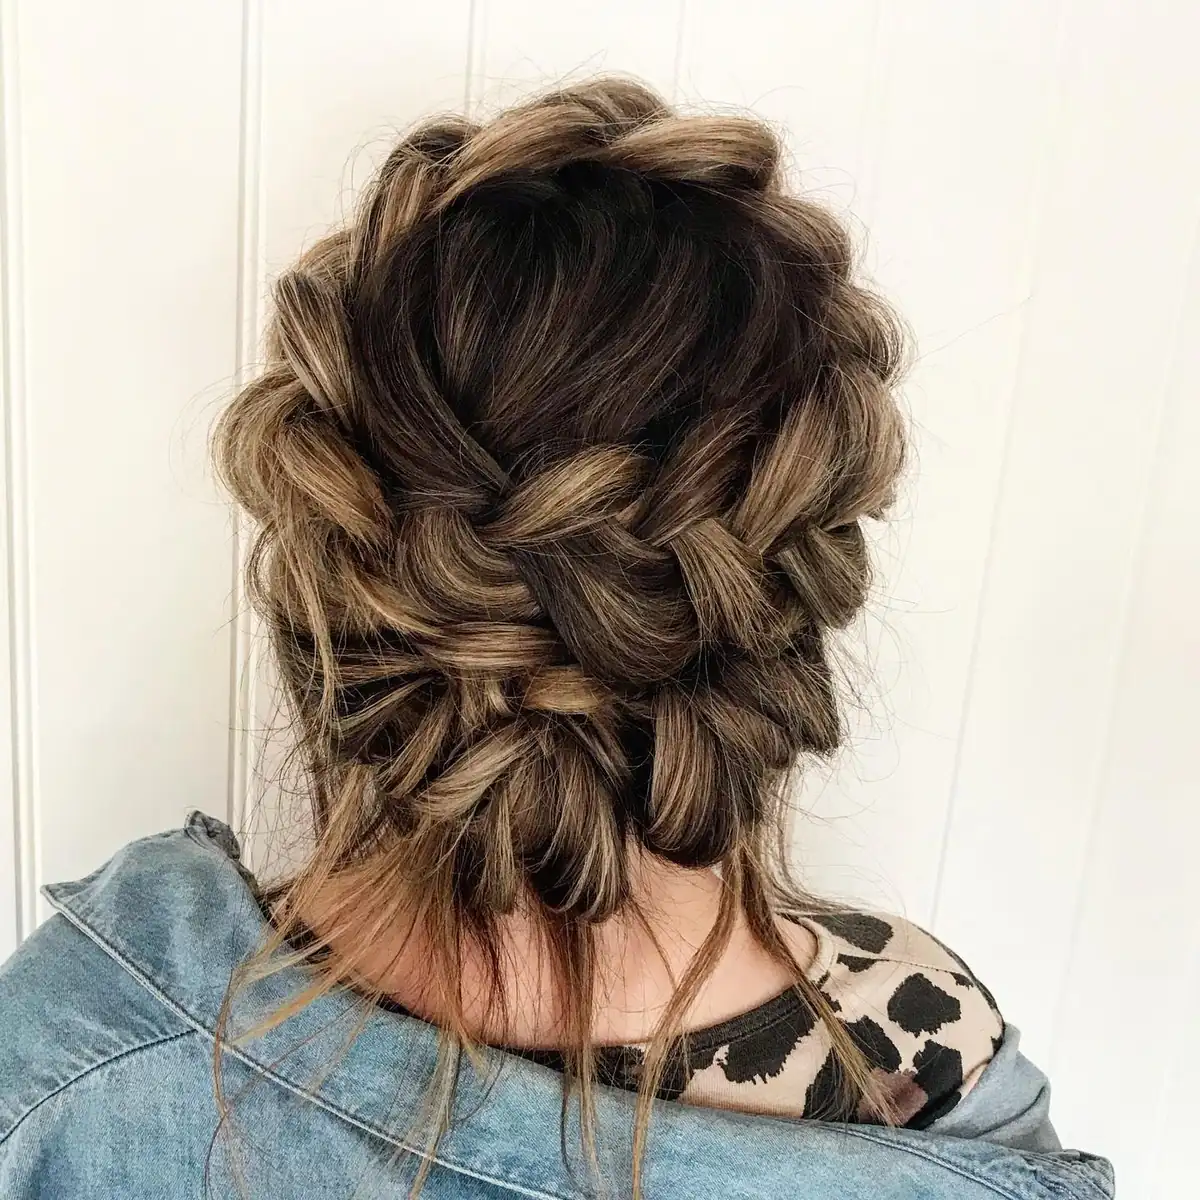
This textured braided updo is pinned up with soft, pulled-out braids, so it looks full even when the hair is fine. It is lovely for holiday parties.
Party touch: Add pearl hair pins or silver rhinestone hair clips for sparkle.
Shop it: pearl hair pins, silver rhinestone hair clips, U-shaped hair pins
Classic Three-Strand Braid
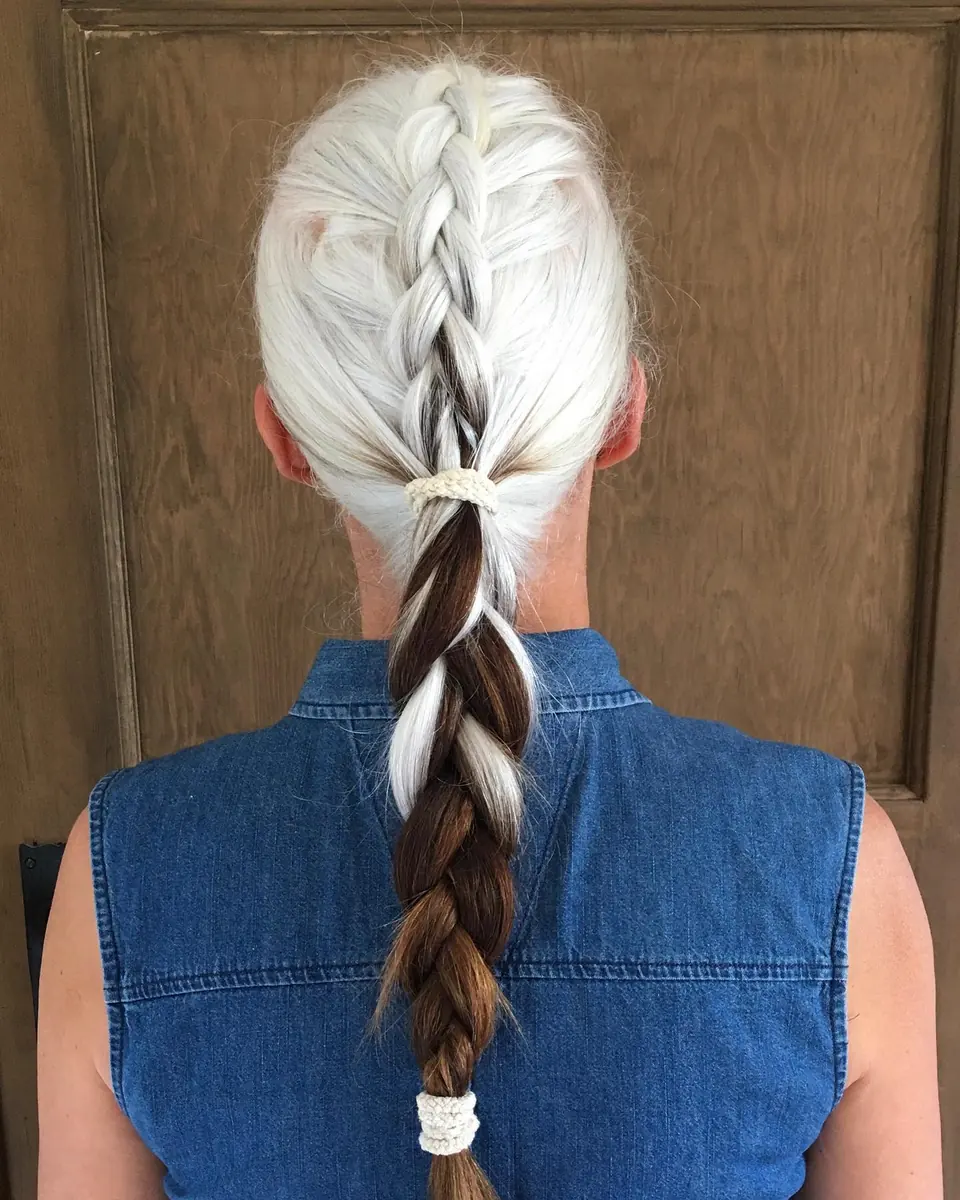
A simple three-strand braid is the easiest place to start, and it is great for growing out color. This white-and-darker braid shows a gray transition; braiding blends the two shades together.
Grow-out note: A braid is a kind way to wear hair while going gray because the colors mix.
Shop it: clear mini elastics, a purple shampoo, a wide-tooth comb
Side Braid

A side braid over one shoulder is quick and pretty, and it pairs well with bangs. It keeps hair from getting caught in scarves and coat collars.
Style tip: Start the braid behind the ear so it falls naturally forward.
Shop it: clear mini elastics, velvet scrunchies, an anti-humidity smoothing spray
Braided Low Bun
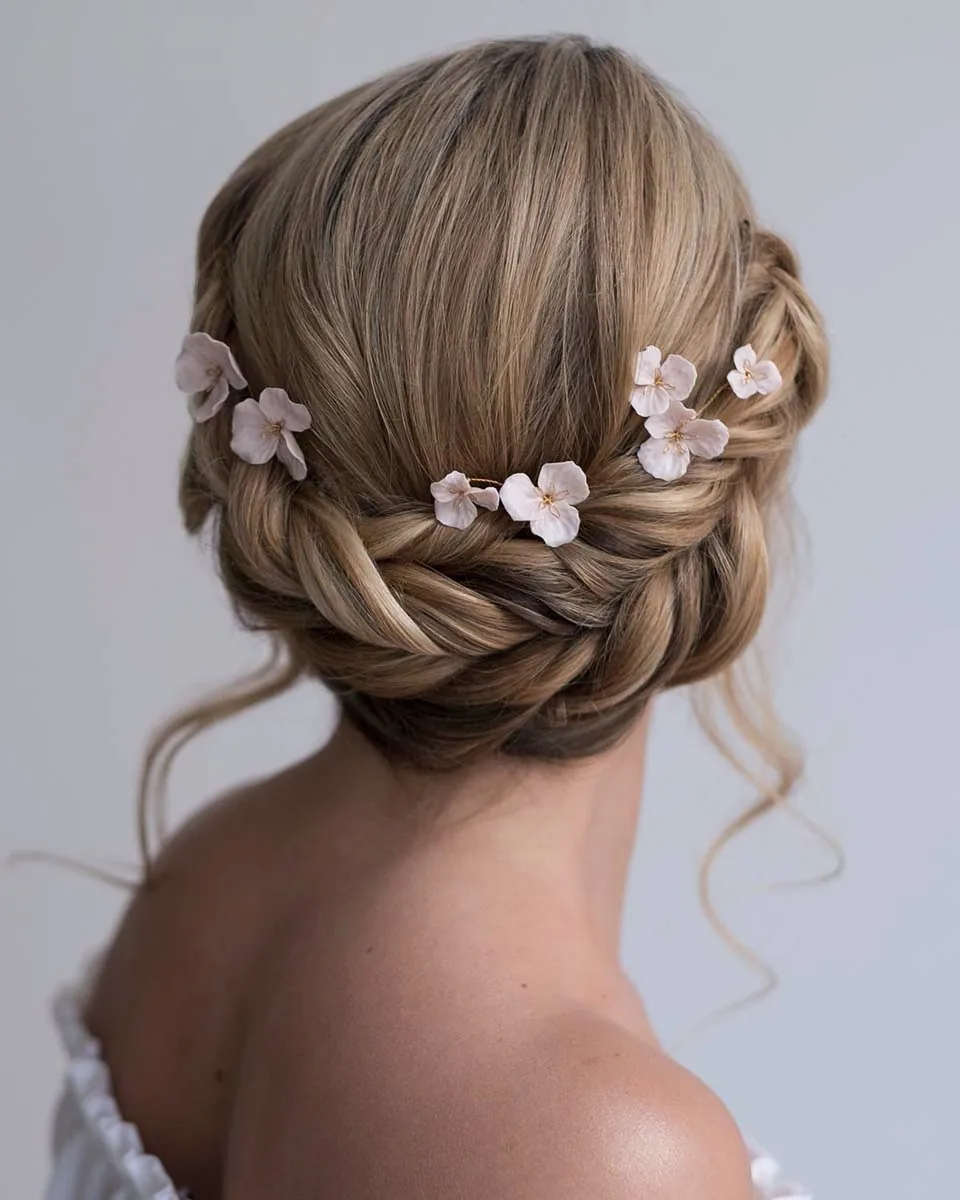
Braid two sections and wrap them into a low bun at the nape for an elegant holiday style. Small flowers or pins make it feel special.
Hair type note: On fine hair, pancake the braids before wrapping so the bun looks bigger.
Shop it: U-shaped hair pins, pearl hair pins, brunette bobby pins
Loose Everyday Braid
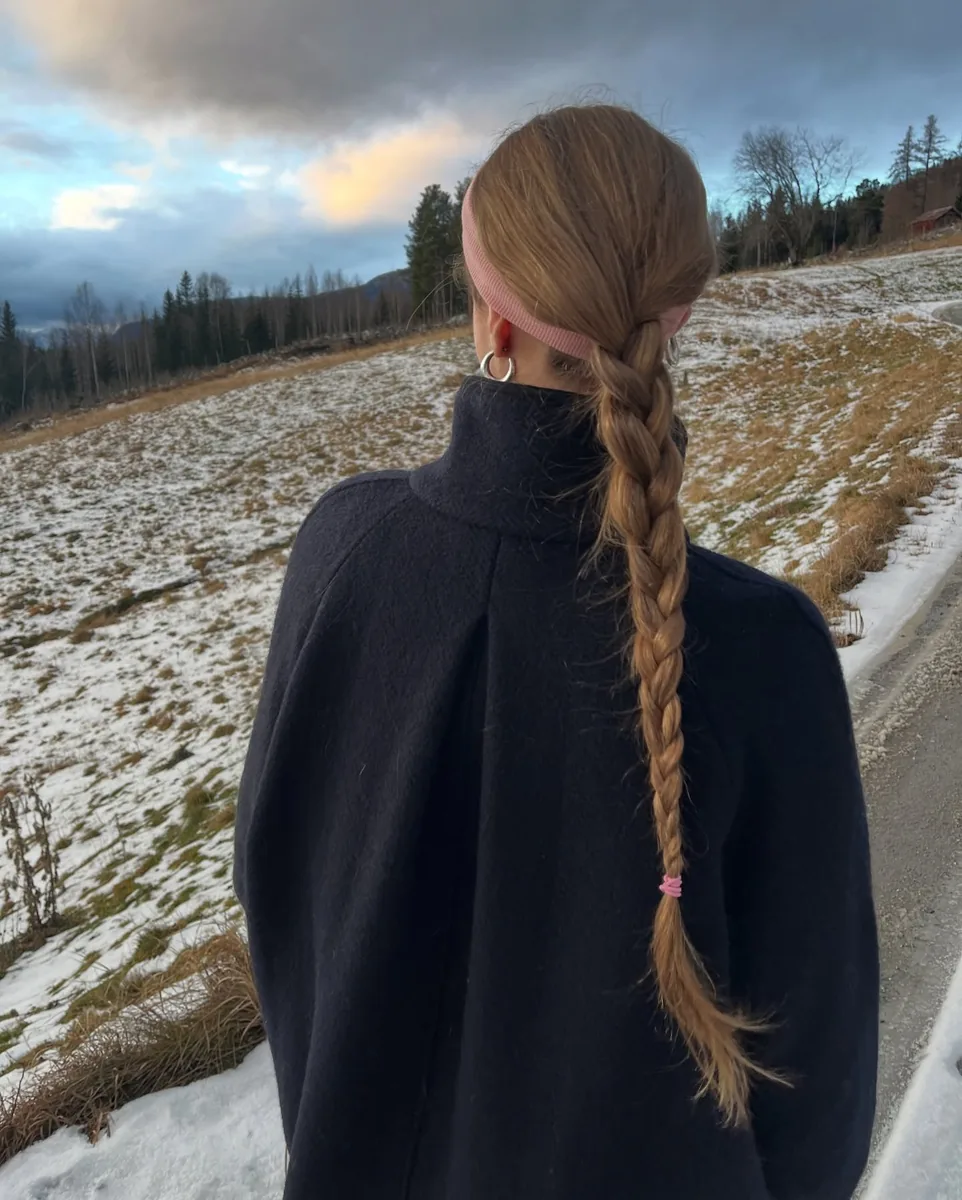
A loose, simple braid is the most low-key winter style of all, and it is perfect for walks in the snow. Keep it relaxed and let a few pieces fall out.
Hat hair fix: Braid before you put on a beanie so your hair is wavy, not flat, when you take it off.
Shop it: mulberry silk scrunchies, an argan hair oil, clear mini elastics
Mistakes to Avoid With Fine Hair
- Braiding hair that is freshly washed and slippery; add a volume and texture spray first.
- Using thick elastics that overwhelm a thin braid; switch to clear mini elastics.
- Pulling loops too hard at the scalp; pancake from the ends upward.
- Brushing braids out roughly; undo them gently with your fingers, brush with a boar bristle brush and use a detangling leave-in spray to prevent breakage.
Start with one braid, practice it a few times, then try the others. With a little grip and a gentle pancake, even fine hair can make a full, pretty winter braid.